2025 Leader & Ender Challenge: Four Patch Fun!
My color inspiration for this year’s challenge came from photos of blooming trees I took this spring.
Nature NEVER disappoints!
Nature also doesn’t care if some colors are “in” or “out.”
The trees just do their thing and bloom right on time.
Take a good look at this photo…notice the different shades of pink. And then look at the leaves. They are not green (Though there is some green grass in the background.)
They are at this point a deep gold.
This photo I took is also an inspiration on color play.
Beautiful pink dogwoods are my absolute springtime favorite – and look at those beautiful gold stamen in the centers.
My first two completed blocks inspired by these colors.
Of course – you can choose which colors you wish to work with – even scrappy everything will turn out wonderfully.
Instructions are for one block.
Pair a 2” neutral strip with a 2” colored strip (at least 16” in length) with right sides together. They will be cut with right sides together, ready to sew, no matching required!
Square off one end of the strip set and cut:
2 pairs of rectangles 2” X 3 1/2” (2 colored, 2 neutral rectangles total)
4 pairs of squares 2” (4 colored, 4 neutral squares total)
You can pin, clip or stack them so you have easy access by your machine.
Here’s 10 ready to stack. It’s easy to keep count by 10s!
Did I get carried away? Maybe!
Half of them are pink/neutral and the other half mustard/neutral – and you’ll even see one in the front row where I ran short of a neutral and pieced it to get that one last square to make it work.
All the needed units, built as Leaders & Enders.
Building Blocks!
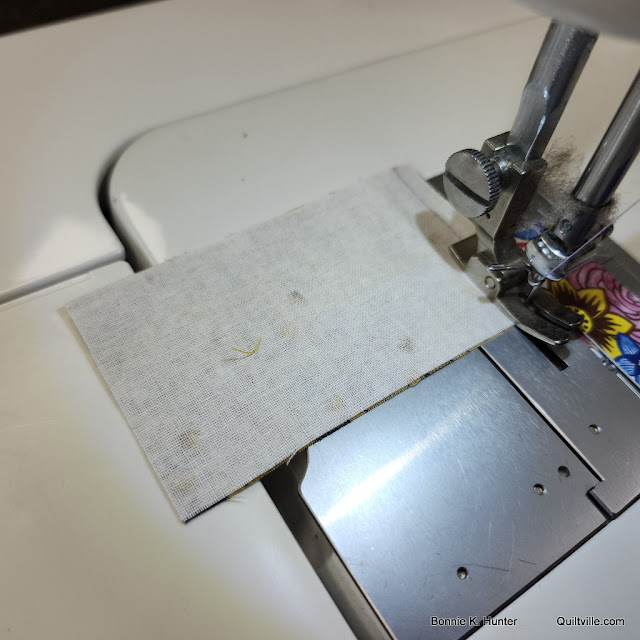
The two pairs of rectangles are sewn on the short side. At the end of your line of chain piecing on your main project, run a pair of rectangles under the presser foot and stop in this position. Trim your work off from behind the presser foot, go press and trim or whatever you need to do.
This pair of rectangles will hold your place until you return to sew on your main project again.
Stitch both pairs of rectangles and press the seams toward the colored fabric.
Units will measure 2” X 6 1/2” unfinished at this point.
If they are too small or too big, this is where you take the opportunity to adjust your seam allowance so that things come out correctly. Your main project will thank you as well!
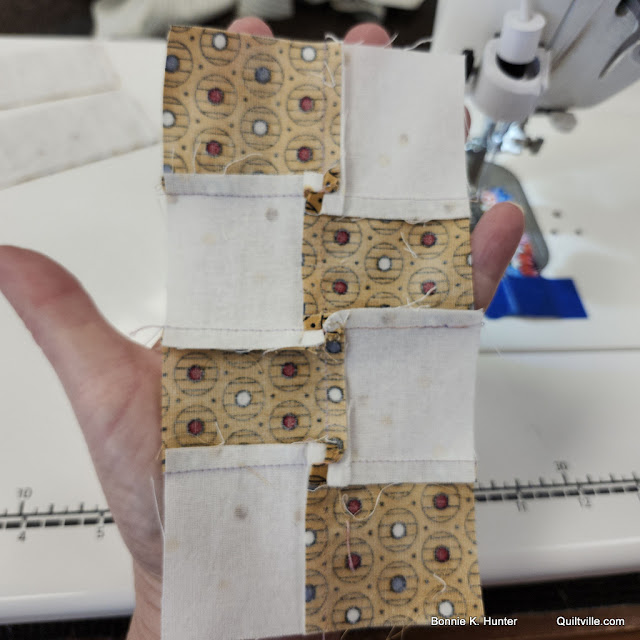
Same thing with the four pairs of squares. Each pair is a half-four-patch.
Press these seams toward the colored fabrics.
Half-four-patches will measure 2” X 3 1/2” unfinished at this point.
My main project is behind the presser foot. I’m getting ready to go press those pieces, so I’m sewing two half-four-patches into a completed four-patch as an ender at this point.
Notice that the colored square is going under the presser foot first, and the top seam allowance is pointing up toward the needle. Be consistent here! This orientation will help snug seams closer together, and keep all four-patch seams spinning in the same direction which is important for nested seams.
I trimmed my work off from behind the presser foot, pressed, came back and began to sew again. At this point, remove the four patch and spin-press the seams.
Here’s another with the dark square going under the needle first, and the seam allowance pointing up. This also means that the seam allowance on the under side is going WITH the feed dogs so the feed dogs will not flip your seam.
To spin press, hold the four-patch like this.
Notice the long center seam is going across – not up and down.
Gently hold down the right side of the center seam allowance with your thumb. Grab both layers of the left hand seam allowance and lift. This will cause a couple of stitches in the short seam allowances to release so that you can spin-press your seams. You’ll see a tiny four-patch in the center of the block. This helps eliminate bulk where pieces come together and enables this four-patch to nest to the second four-patch no matter now you turn the pieces.
Can you see how these seams are rotating clockwise? Look at the seams like a clock: 12, 3, 6, 9. It’s only 9 o’clock that needs to reverse to follow suit. Press with the iron at this point.
Keep using these pairs as Leaders and Enders and soon you’ll have 2 four-patches. They will measure 3 1/2” unfinished at this point.
Place blocks in this orientation before sewing them together, with the light squares at the bottom left of both four-patches.
Stitch the center seam as your next leader & ender!
This center seam has to spin too -but it is going to go in the opposite direction, counter clockwise instead of clockwise.
The seams in the four-patches are the boss of which way that center seam is going to spin. In this case, hold the left hand side of that seam down with your thumb, and lift the two layers of the right hand of the seam to get those stitches to release creating another tiny four patch spin in the center. Press.
Adding Side Rectangles:
If you have pressed as directed and spun your four-patches as shown, your side rectangles will nest with your center unit.
I know it’s exciting to see this block coming together, but use these sections as Leaders & Enders while continuing to sew on your main project. Add one side section, pressing outward toward the side rectangles.
KEEP SEWING ON YOUR MAIN PROJECT!
When you have reached the point where your main project needs a trip to the iron or trimming station – attach that last rectangle section to the block.
And this is the hardest part for me – leaving this under the presser foot until I sew some more on my main project because I want to get this block out of there and give it a final press so I can admire it and add it to the completed pile.
But it stays under the presser foot until I come back with pieces of my main project and start feeding them through.
At that point I can snip the completed block off of my chain from behind the presser foot.
Press that last seam out toward the rectangles.
Here’s a pink one in progress with some of my current project behind the presser foot. I’m nearly there – and these blocks are building themselves while I work on my main project.
One more seam!!
Blocks will measure 6 1/2” unfinished and finish at 6” in the quilt.


